| week1 | ||
| week2 | ||
| class3.png | ||
| class4.png | ||
| Readme.md | ||
Course Description
In this course at TTLMakerspace, you will go from beginner to understanding the basic principles of electronics, working with microcontrollers, and programming for experiential electronics using light, sound, and motion.
Starting with a simple “blink” sketch, you’ll get your first microcontroller up and running, and advance to reading sensors, creating displays, and connecting it all together through local networks and the internet.
Schedule: Six three-hour weekly classes, 6pm to 9pm
Outcomes:
At the end of this course you will have achieved the following goals:
- Familiarity with the basic rules of electricity
- Understanding of AC vs DC current
- Know the differences between, and applications of, analog and digital
- Work with single-board computers and microcontrollers
- Understand and be able to program serial communication
- Work with simple web services
- Read and interpret sensor input
- Perform detailed motor control and lighting
- Design a custom printed circuit board
Following this course, you’ll have a good grasp of modern programming related to working with circuits. And you will be able to join the growing community of TTL Makers sharing electronic and programming knowledge on our Discord community.
Useful for: arcade controls, weather stations, internet-of-things, RGB lighting, home automation, embedded systems, data-logging
What To Expect
Week 1 - Concepts of Electronics
Introduction to concepts of electronics and programming.
- Amperage, current, resistance, voltage - simple essential formulas
- The most common electronics symbols
- Recognizing the most common components
- Good sources for parts, planning your supply
- First circuit demonstration

Exercise 1 - Get to blinky. Breadboard your first circuit! Learn to connect power and use resistors.
Week 2 - Analog and Digital
Learn the difference between analog and digital electronics, and how to get them working together. Get familiar with common sensors, and progress from breadboarding to perf-boarding (soldering!)
- Create your first circuit
- Inputs and outputs
- Analog vs. Digital
- Introduction to sensors
- Basics of the Oscilliscope
Concepts Covered:
- Soldering
- Uses for perf-board
- Reading analog signals
- Analog to Digital converters
- Motor control and Pulse Width Modulation

Exercise 1 - Motor controller - Create a classic H-bridge controller using mosfets to control brushed DC motors
Week 3 - MicroControllers and SBC
Having gotten a light introduction to microcontrollers, we go deeper comparing and matching them with Single Board Computers to expand our interaction with motors and sensors.
- Introduction and experiments with most common microcontrollers
- Setting up a programming environment
- Reading and understanding microcontroller specifications
- Programming a microcontroller (python and C)
- SBC and Microcontroller differences
- Introduction to linux systems
- Installing software, compiling software
- Programming the SBC
- Connecting the SBC and Microcontroller
Concepts Covered:
- Linux systems
- Terminal usage
- Serial Communication
- UI creation
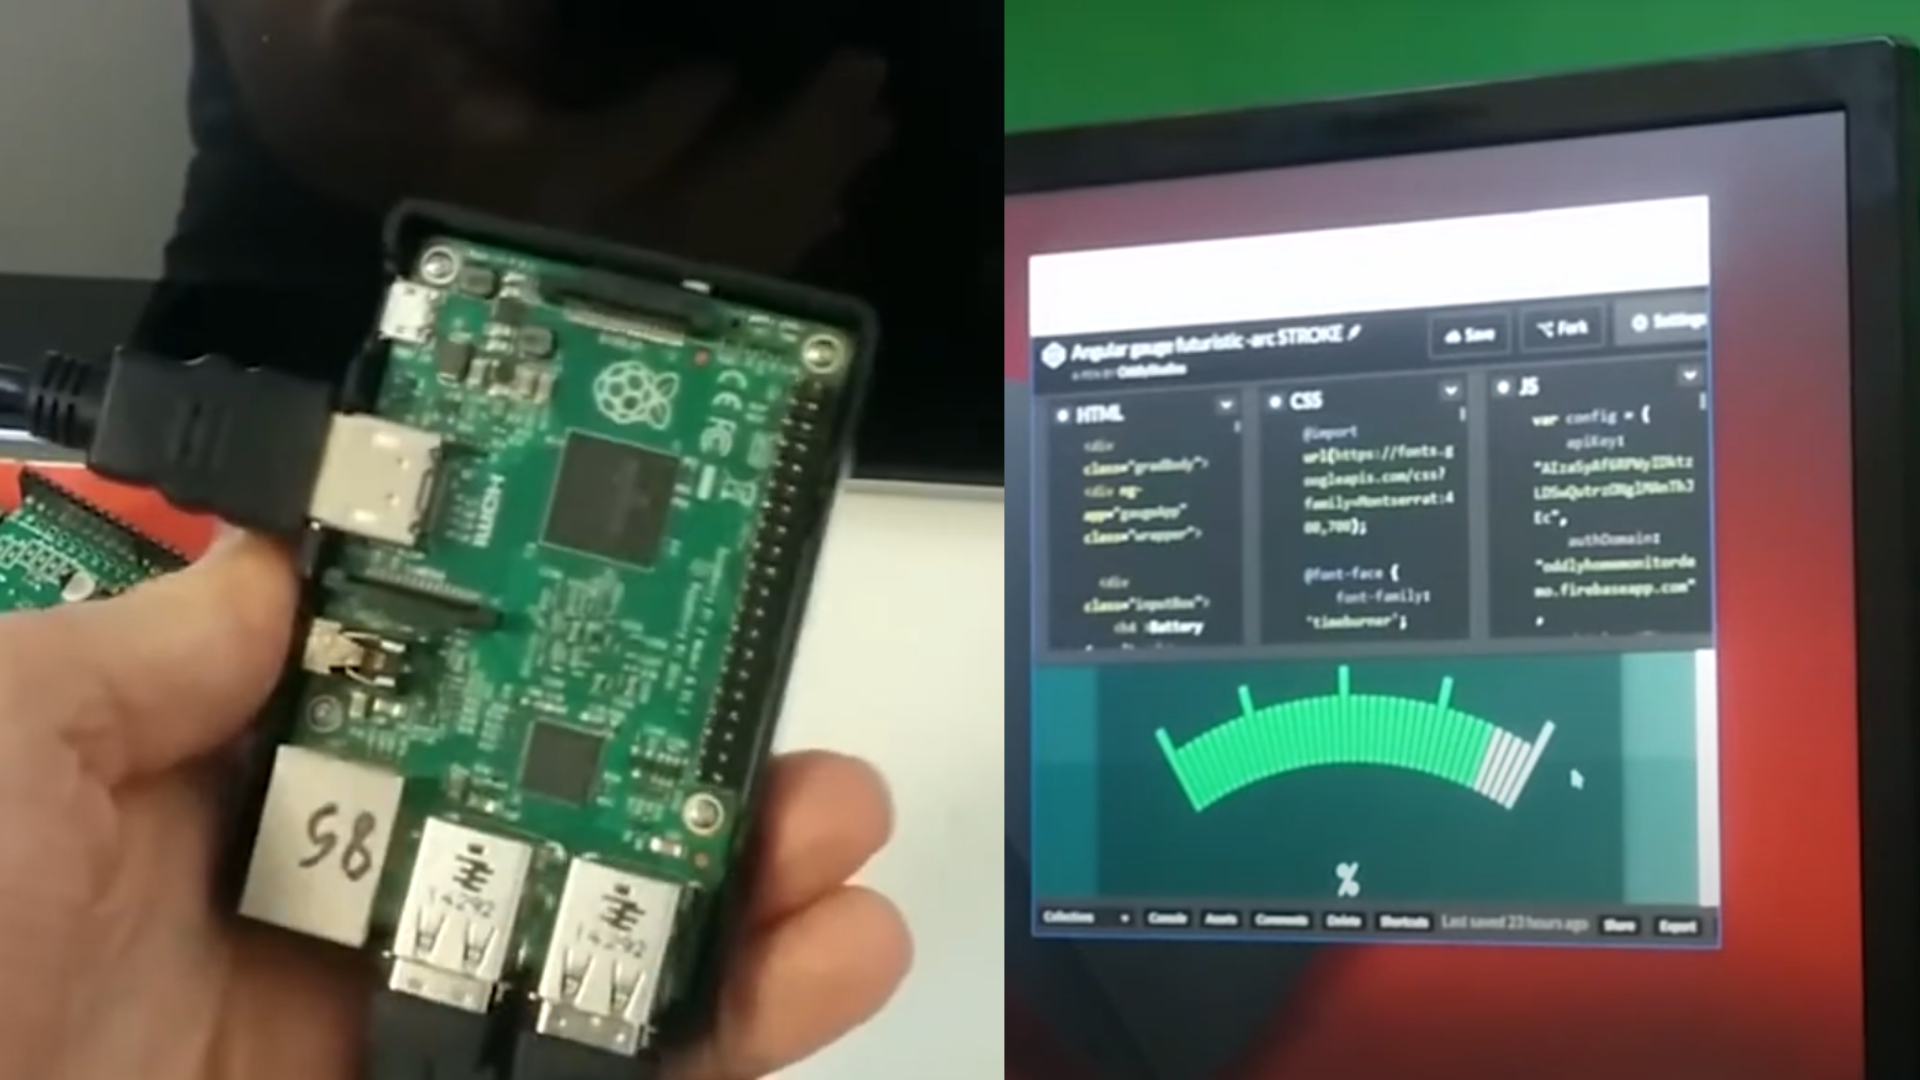
Project: Weather Station - Use serial communication to connect a microcontroller to a Single Board Computer for sensor reading, design a UI
Week 4 - PCB Design
Take your skills up a level and go from using breadboard and perf-board to designing custom printed circuit boards such as you might use in designing a product.
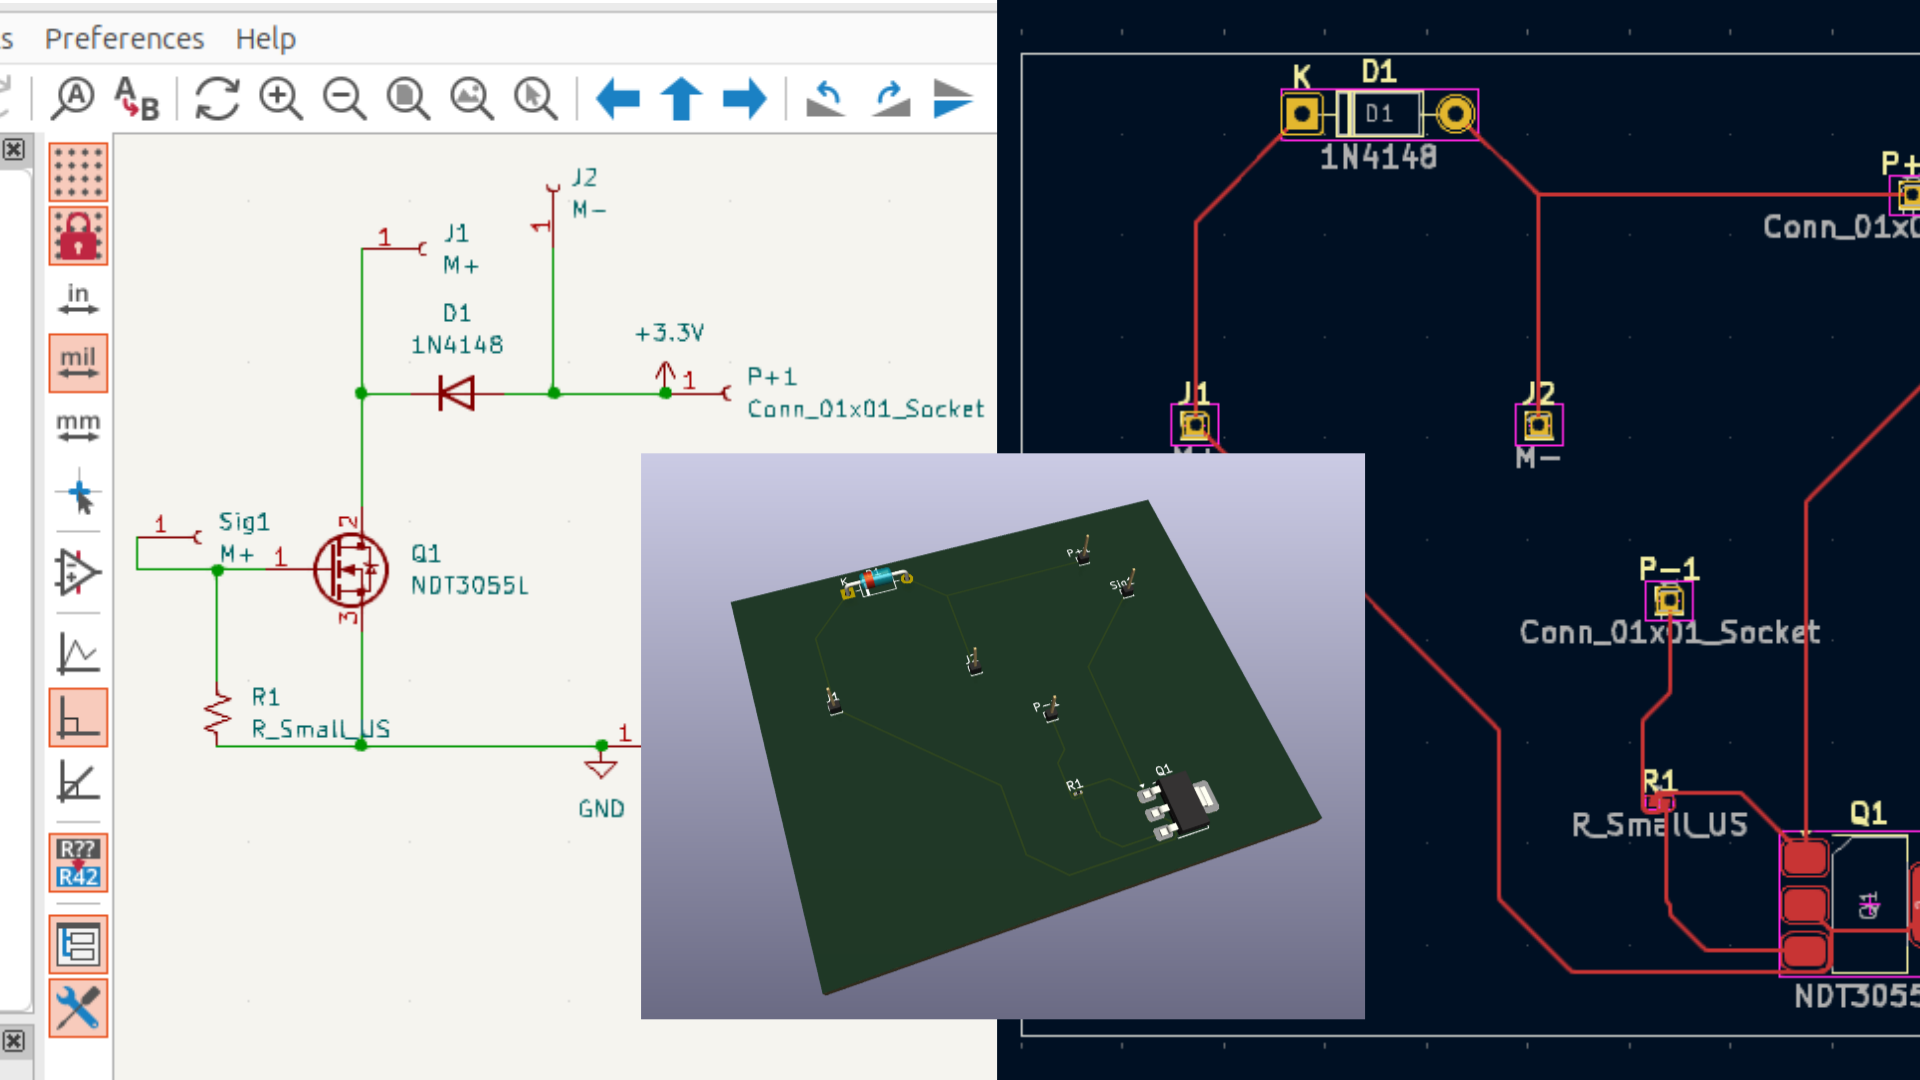
- Understanding schematics
- Introduction to KiCAD
- Setting up the software
- PCB design considerations
- Creating symbols
- Creating footprints
- Routing and vias
Concepts Covered:
- Workbenches - schematic, PCB creator
- Creating symbols
- Layers and Routing
- Creating footprints for components
- Working with vendor requirements
Project Pt 1: Create your first custom printed circuit board. Learn to design for custom components and create a PCB that will print successfully with a PCB vendor. These boards will be assembled in week 6.
Week 5 - Internet of Things
Returning to our Single Board Computer/Microcontroller pair, we learn the basics of connecting to networks and expanding our device communications.

- Working with Serial Communication
- Protocols for data communication
- Connecting to the internet
- Running an MQQT server
- Passing information between microcontrollers, SBCs, and internet applications
Concepts Covered:
- MQTT
- REST servers
- Sockets
Project Pt 2: Create a real-time local network to get devices talking, then expand this to an internet-based service.
Week 6 - Demo Scene
Assemble your custom-made PCB into a working, powered circuit. Combine your skills to connect it locally and to the internet.

- Assembly and testing of custom PCB
- Surface mount techniques
- Using a solder reflow plate
- Demonstrate your working project
- Talk about what you’d like to do next
Concepts Covered:
- Surface mount and through-hole
- Solder re-flow
- Mitres, bends, extensions
Project Final: Create your own connected, custom-made device, demonstrating your knowledge of components, circuits, and board design.
During the program:
To complete the program, you must complete all assignments and demonstrate proficiency. Make arrangements to catch up missed classes. Use the provided electronics to practice (subject to availability/classes)
Materials and Requirements
All materials, tools, computers, and software will be provided by TTLMakerspace and are expected to be returned for the next participants. Additionally, video lessons will be provided to all participants. You should dress comfortably and follow shop safety guidelines - no loose, hanging clothing or items that could get caught in machinery around the shop.
If you hit a snag, let me know!
Following the program:
- With membership, can use equipment at any time.
Tips For Success:
- Practice! Use the small machines.
- Make your own files
- Have a project in mind, but don’t miss important concepts by being focus-locked on it.